In our photography tips blog entries our professional photography tutors will be offering up advice, tips and tricks to help you to improve your photography. If you are just starting out with your first Digital SLR Camera, then don’t forget that we have a range of London Digital Photography Courses to help you on your journey. Our first set of helpful tips will be covering a fundamental element of capturing a great photograph: Aperture.
What is aperture?
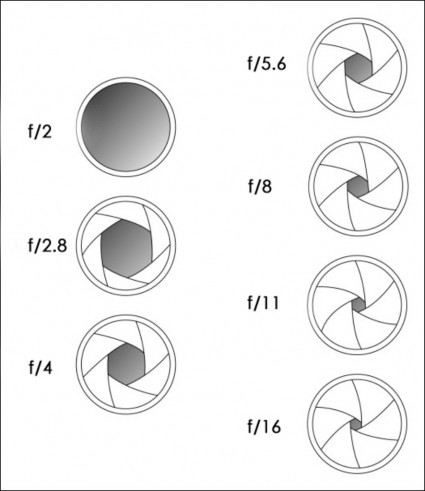
The aperture is the opening within your lens that lets light through to the digital sensor, on old cameras the light would go straight to the film. The wider the aperture opening, the more light will pass through, and vice versa. The size of the aperture opening is dictated by a series of fins on the edge of the lens barrel, and is measured in something called f-stops, which is commonly written as f/2.8, f/5.9 etc. The smaller numbers denote wider apertures.
How is Aperture measured?
Lenses usually have their maximum aperture setting marked on one end of the barrel. A zoom lens will have two measurements, often stated as f/3.5-f/5.9 or something similar. These measurements describe the maximum aperture at the wide angle and at the telephoto (maximum zoom) lens positions. You should always look to purchase lenses with the smallest number you can afford in each position.
Do not use aperture to compensate for poor lighting:
As we have learned so far changing the aperture dramatically effects the amount of light that the camera receives. If you are photographing landscapes with a narrow aperture (higher f-stop) you will notice that your camera will want to take a longer exposure and you may have to use a tripod to avoid undesired blurring. It is important that you avoid using the camera’s aperture to compensate for poor lighting, because it will also affect how much of the image stays in focus.
Using aperture for portraits:
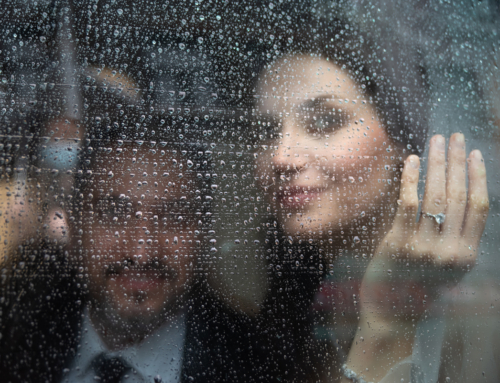
The widening of the aperture in a camera lens has the same effect as the enlarging of the pupils in the human eye: it sharpens the focus on the subject and blurs everything else, both in front and behind. This is what is known as shallow depth of field. Shallow depth of field is ideal for portrait photography, as it can be used to bring forward your model and draw them out from within the scene, making them the main focus of your image. We would recommend f/1.8 or a similar aperture setting.
Using aperture for landscapes:
Landscape shots are the opposite, aperture wise, to portraits. For a landscape image you want to have everything in focus and can often be dealing with a very wide area, with objects near and far needing to be sharply focused. This is where you would select a narrow aperture. We would suggest something in the region of f/22, depending on your equipment. Ideally you want the tightest setting available on your camera.
Hedging your bets with f/8:
Using the simple rules above you will be able to fairly easily estimate which aperture to use when capturing static portrait and landscape shows. Things get trickier however when it comes to reportage and street photography, as well as social events like parties and weddings, as these environments are far less predictable. Your subjects in these situations will often be moving unpredictably and you will need to be ready and confident enough to capture the moment and not miss a potentially great shot because you are worrying about your camera settings. Professional photographers have an old saying which is “f/8 and be there”. If you have your aperture set to f/8 you should achieve a manageable balance of fairly fast shutter speeds and broad depths of field, this will leave you free to compose your shots and pick your moments more effectively.
We hope you have enjoyed these tips and that they have gone some way to helping you understand aperture. If you would like to learn more from our professional photographers in a hands-on, engaging learning environment, then please click HERE to see our full range of courses.


Leave A Comment